
Know what matters.
Confirm the schedule, essential shots, key people and specific requests. Identify moments you cannot repeat, and clarify anything missing with your CVM lead before the shoot.
FOR CVM PHOTOGRAPHERS & VIDEOGRAPHERS
A practical guide to creating event content our clients can use—and making the whole experience easier for the team.
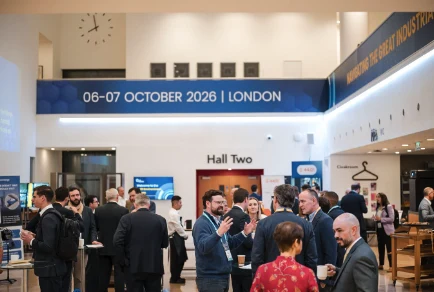
Create images our clients can use and our editors can work with easily.
CVM FIELD GUIDE
Read the CVM brief before every shoot, even for a familiar client or event. Requirements change. Follow the current brief so you capture the right moments and deliver what this client needs, this time.
Confirm the schedule, essential shots, key people and specific requests. Identify moments you cannot repeat, and clarify anything missing with your CVM lead before the shoot.
Locate every area that needs coverage, including separate networking rooms and exhibitor spaces. Check with the organiser or CVM lead about venue restrictions and anyone who has requested not to be photographed.
Get the exhibitor list and stand locations beforehand. Create a checklist and agree who covers each stand. If assignments are unclear, ask your CVM lead. If time is tight on the day, agree the split with the other photographers so no company is missed.
CVM FIELD GUIDE
Think about where the photographs will appear: website banners, LinkedIn posts, email newsletters, event recaps and post-event reports. Give the marketing team clean compositions, strong expressions and a useful variety of images.
Start with an unobstructed, front-facing view, with most of the speaker’s face visible. Wait for them to look up from their notes. Look for an engaging expression, a smile and natural hand gestures.
Capture a full-length view where possible, a medium shot and a tighter portrait. Secure the front-facing photographs, then add a strong side angle. Once you have these, explore wider compositions and higher or lower viewpoints.
Review your photographs before changing position. Check focus, exposure, framing and expression. Zoom in to confirm sharpness, and make sure there is room for gestures and cropping.
Get it right in camera. Do not shoot with the expectation that AI will repair missed focus or rebuild a cramped composition. Repairs add time and cost, and may not produce a usable result. The original photograph needs to work—especially when the moment cannot be repeated.
Keep shooting until the required coverage is secure. Aim for useful variety rather than unnecessary duplicates: wide views of the room, medium shots of interactions and tighter photographs of expressions and details.
Strong reactions, genuine smiles and clear storytelling matter more than the total number of frames.
“How could the client’s marketing team use this?”
Ask before you shoot, then review the result. Would it work on their website or LinkedIn? Is the expression strong, the subject clear and the framing useful?
Good coverage is measured by the photographs the client can use.
CVM FIELD GUIDE
Flattering photographs of people smiling towards the camera are a core part of CVM’s event coverage. Prioritise natural proportions, considered framing and soft backgrounds that help people stand out.
Use 50mm or longer for individuals and posed groups when space allows. Step back to compose: the greater shooting distance helps avoid exaggerated perspective, while the longer lens gives the background a more compressed appearance.
Use 35mm when space is limited. Reserve 24mm primarily for establishing shots and wide room coverage.
Choose a small set of focal lengths and use them deliberately. This helps our tiled galleries feel visually consistent.
On a 24–70mm lens, work around 35mm, 50mm and 70mm. You might favour 35mm and 70mm in tighter spaces, or 50mm and 70mm when there is more room. Set your focal length, then move to compose instead of adjusting the zoom for every frame.
Camera-facing portraits deserve care. Guide people into position, check that every face is visible and encourage natural smiles. Compose at a flattering height, with comfortable space around the group.
Do not rush. A few seconds of clear direction can turn an ordinary group photograph into one the client wants to share.
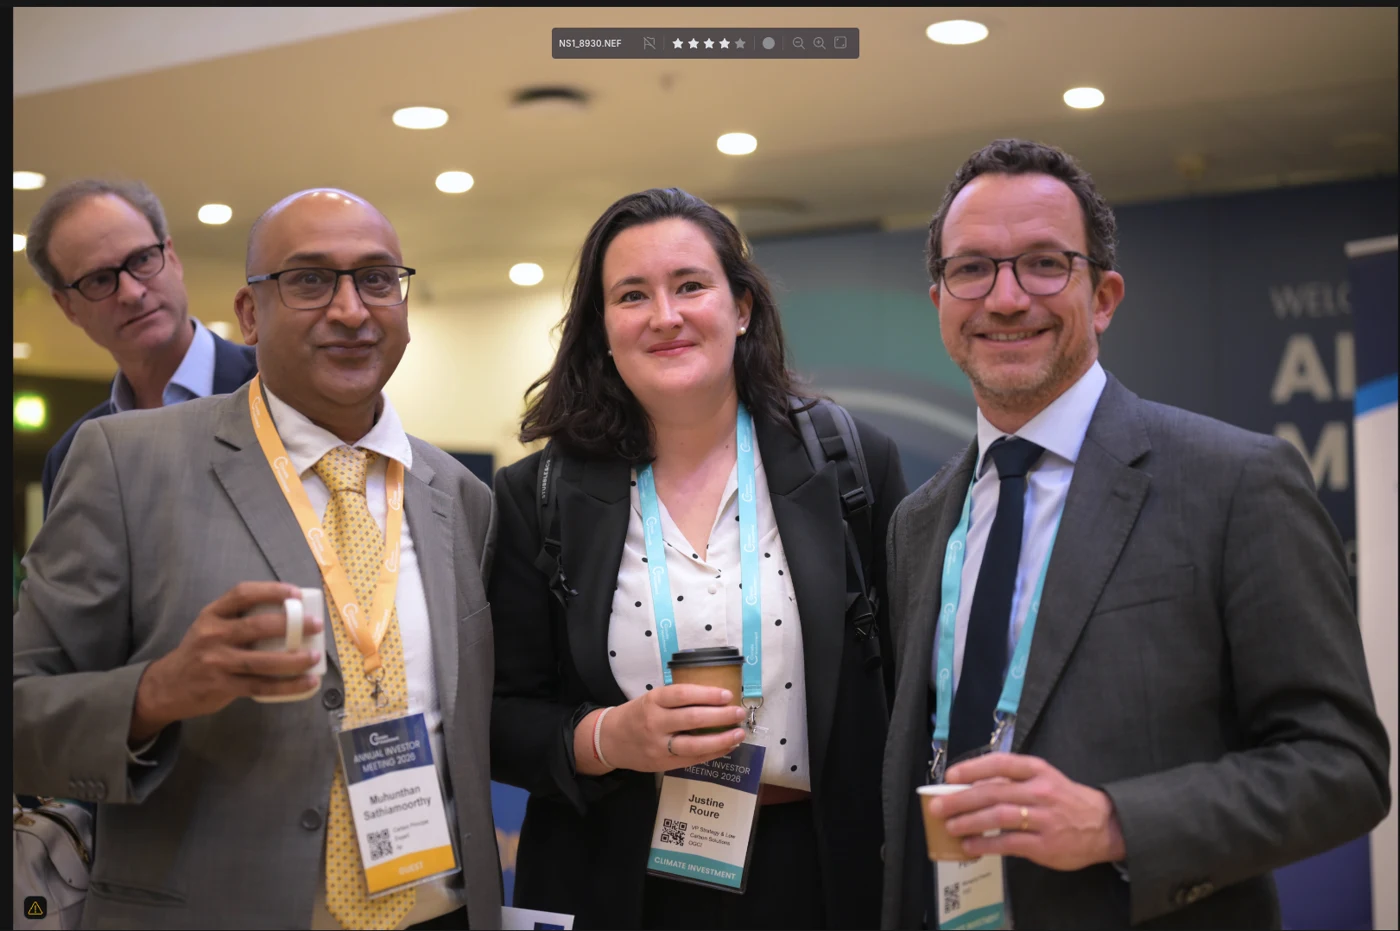
The group presses against the edges. There is little room left for a different crop.
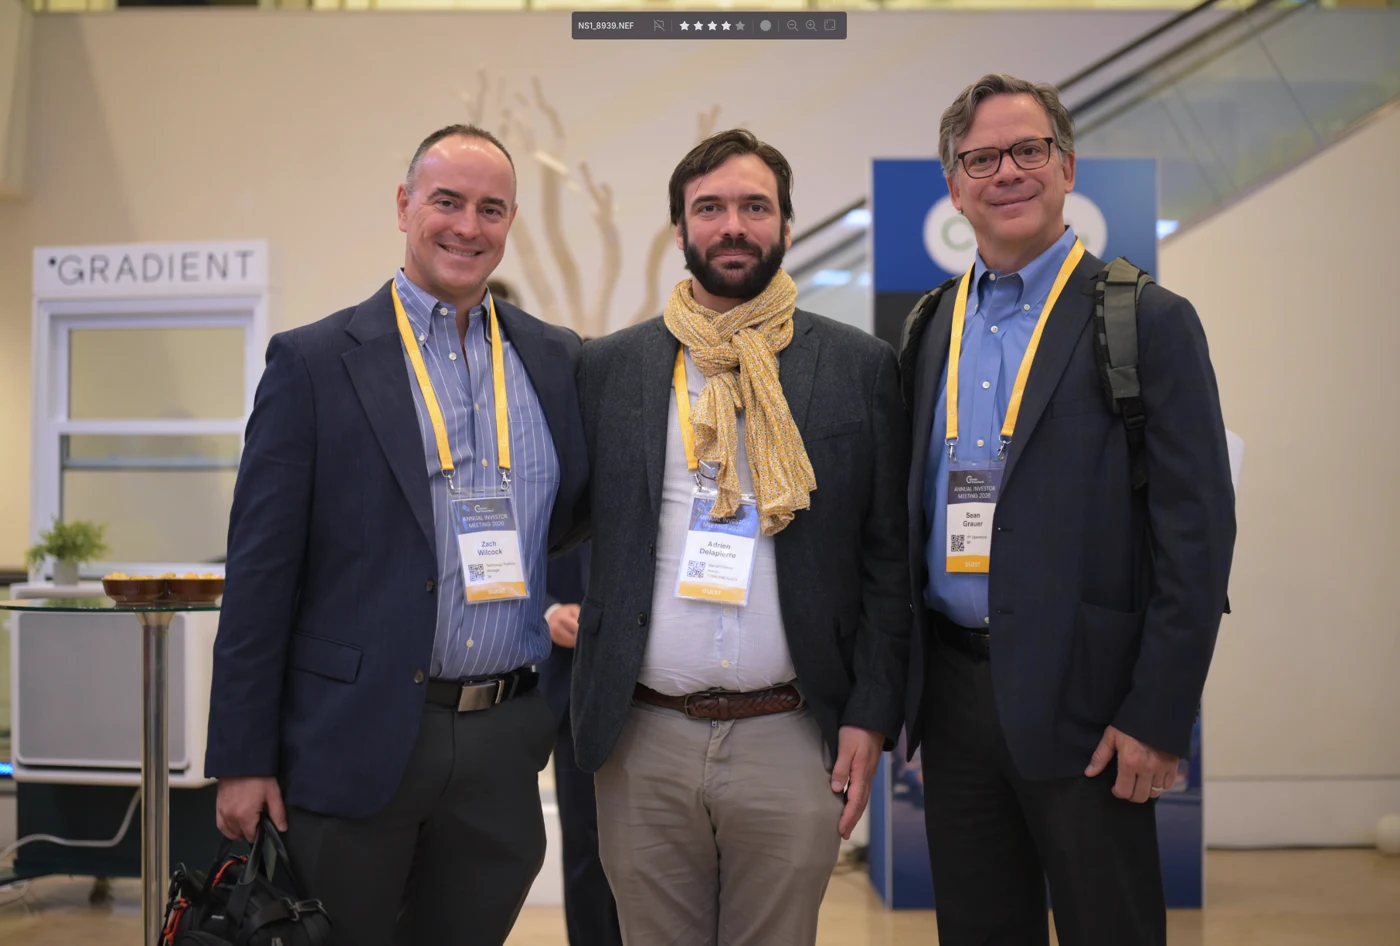
This 35mm example leaves more breathing room. Prefer 50mm+ where the space allows.
Allow space for gestures and later cropping. Avoid accidentally cutting off fingers, wrists or elbows.
A shallow depth of field is part of the CVM look. Sharp faces come first.
CVM FIELD GUIDE
Secure a clear view, a strong expression and the right focus—then check that you really have it.
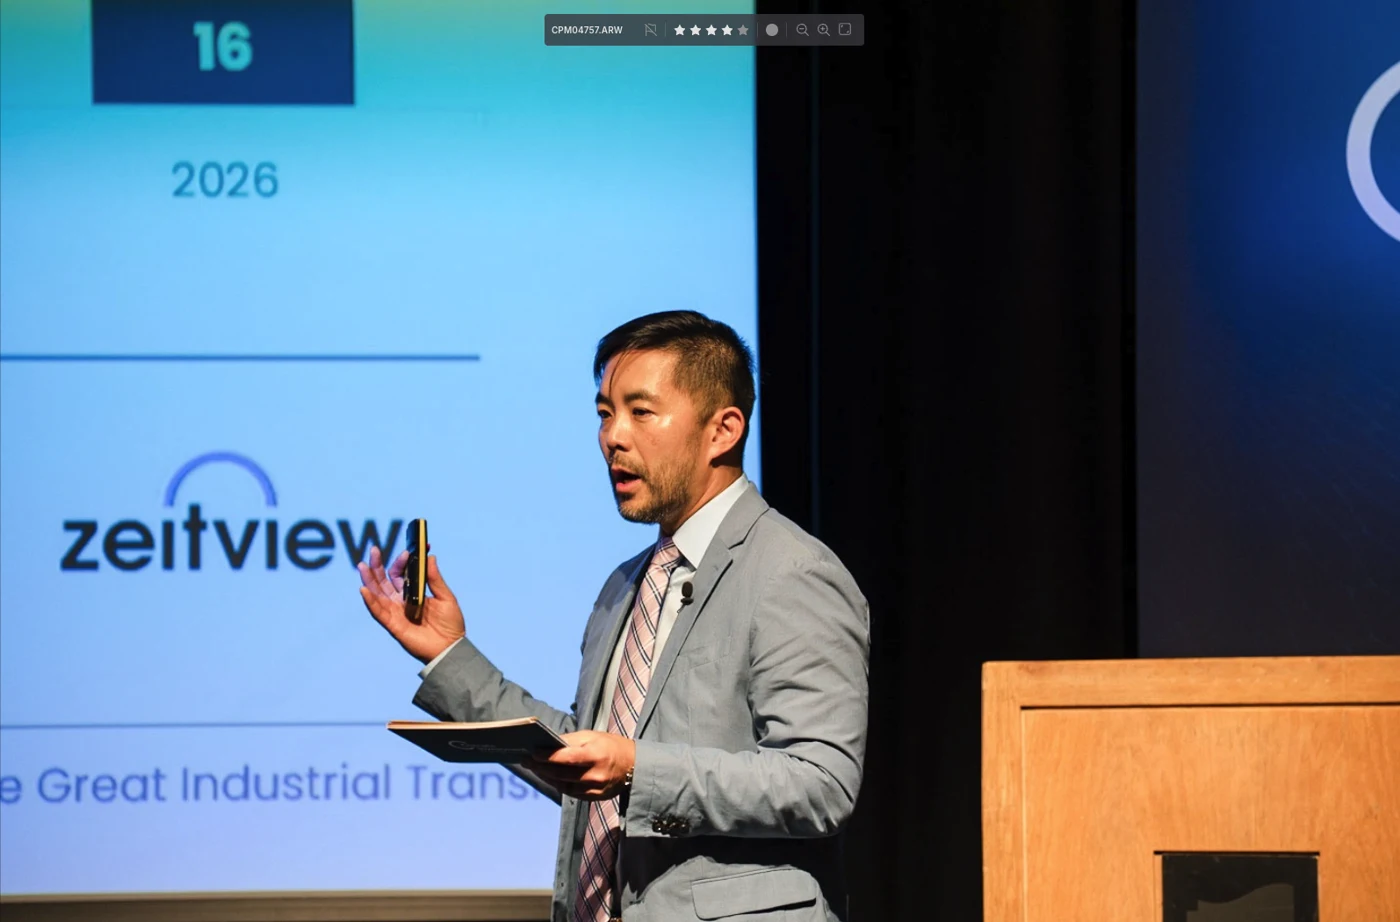
The speaker sits low beneath excess headroom.
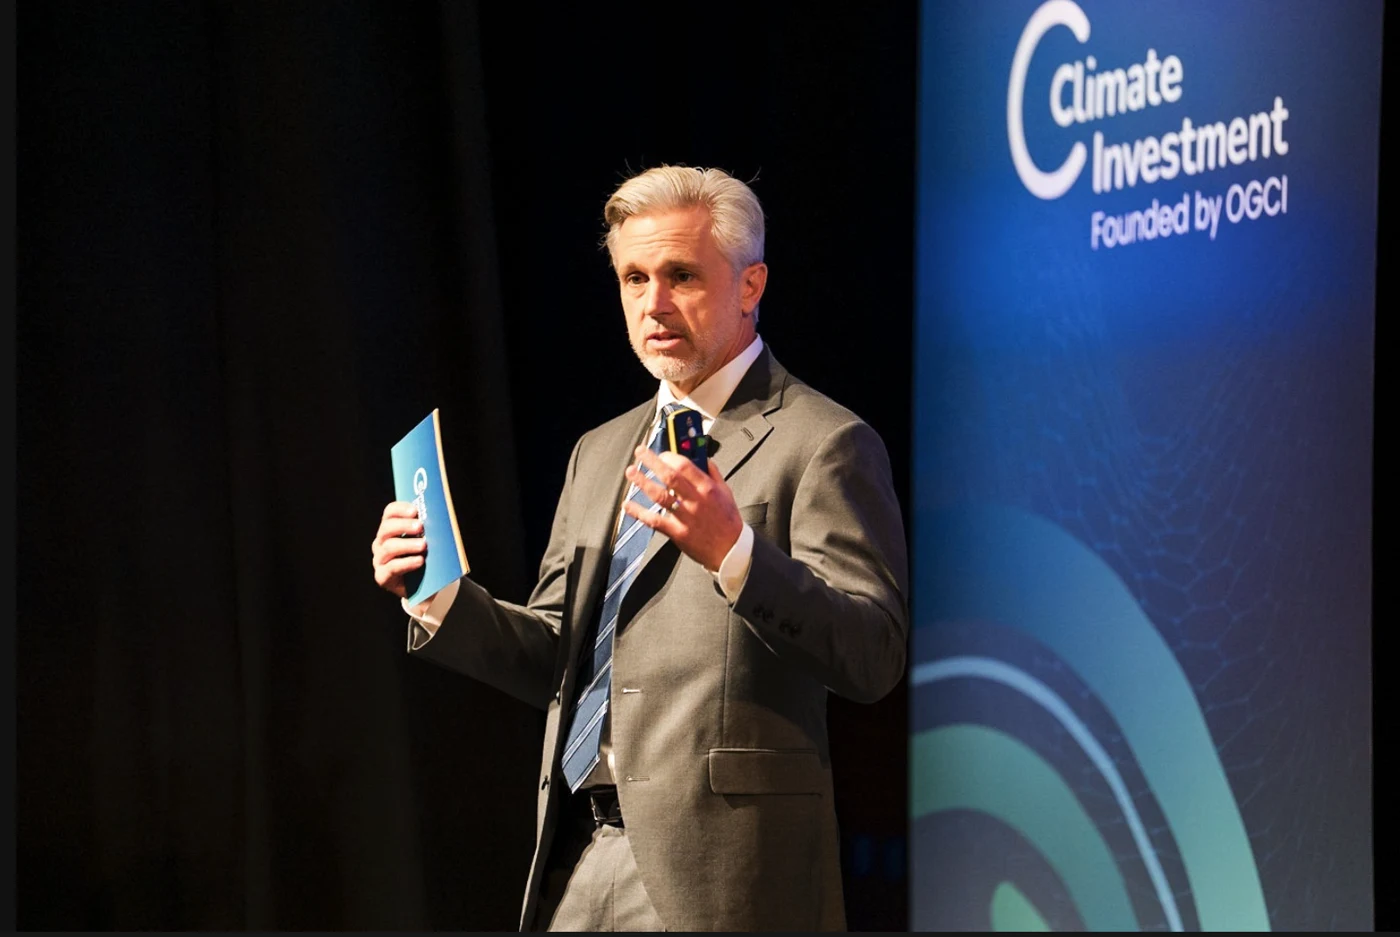
Eyes near the upper third, comfortable headroom and useful branding.
Look for natural hand gestures, visible speaking or a smile. Wait for the speaker to look towards the audience rather than down at notes or back at the screen.
Give the person space in the direction of their gaze and gesture. A left-facing speaker usually needs more room on the left.
Use brief checks between key moments: eyes in focus, useful expression, exposure, margins and no obstruction. Star strong photographs in camera to help the editor.
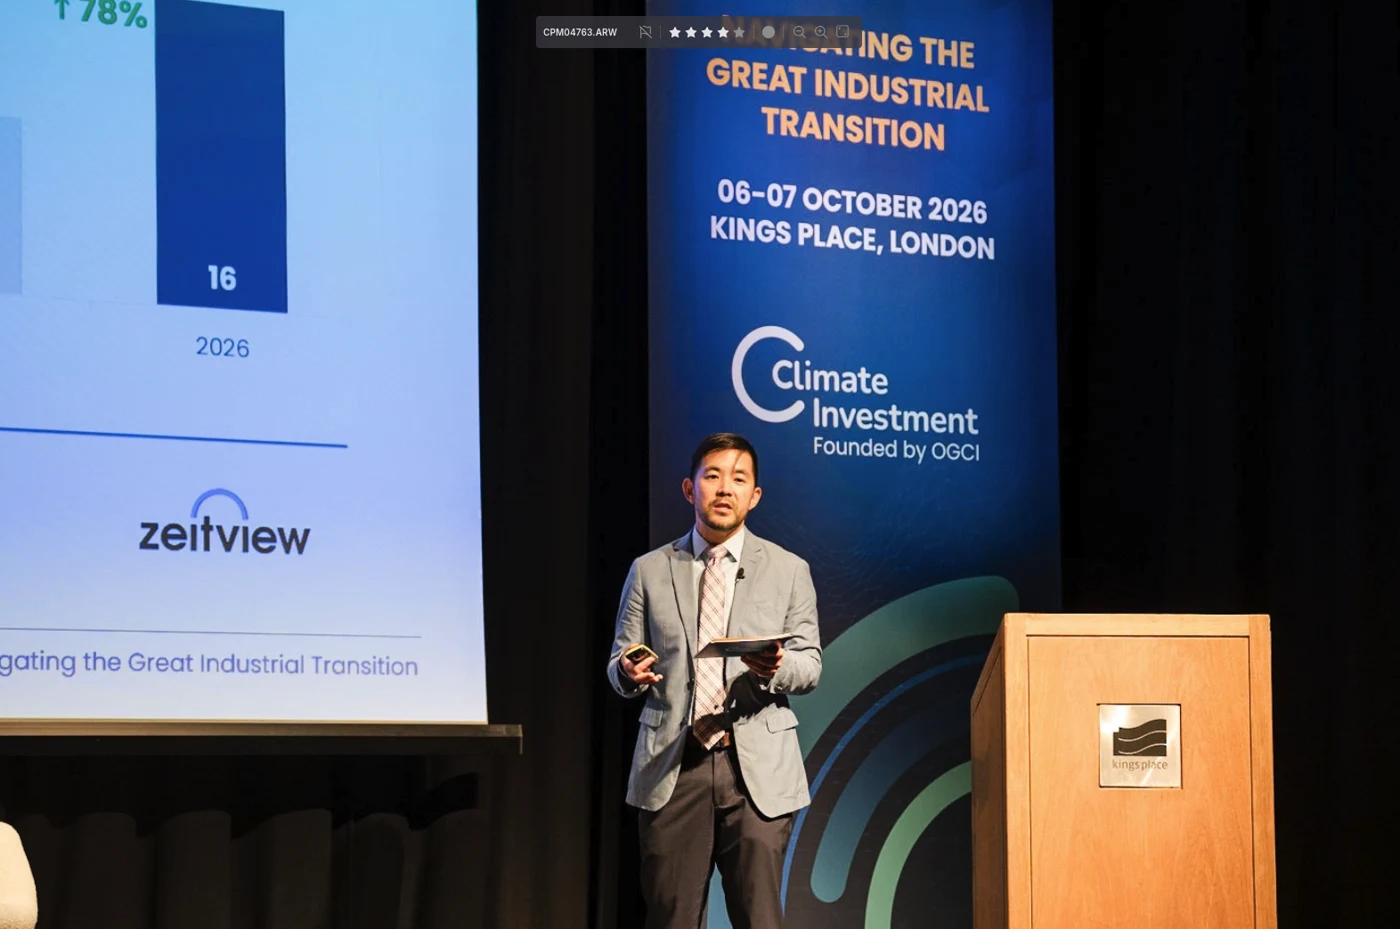
A lower speaker position can work when the client’s logo is deliberately part of the composition.
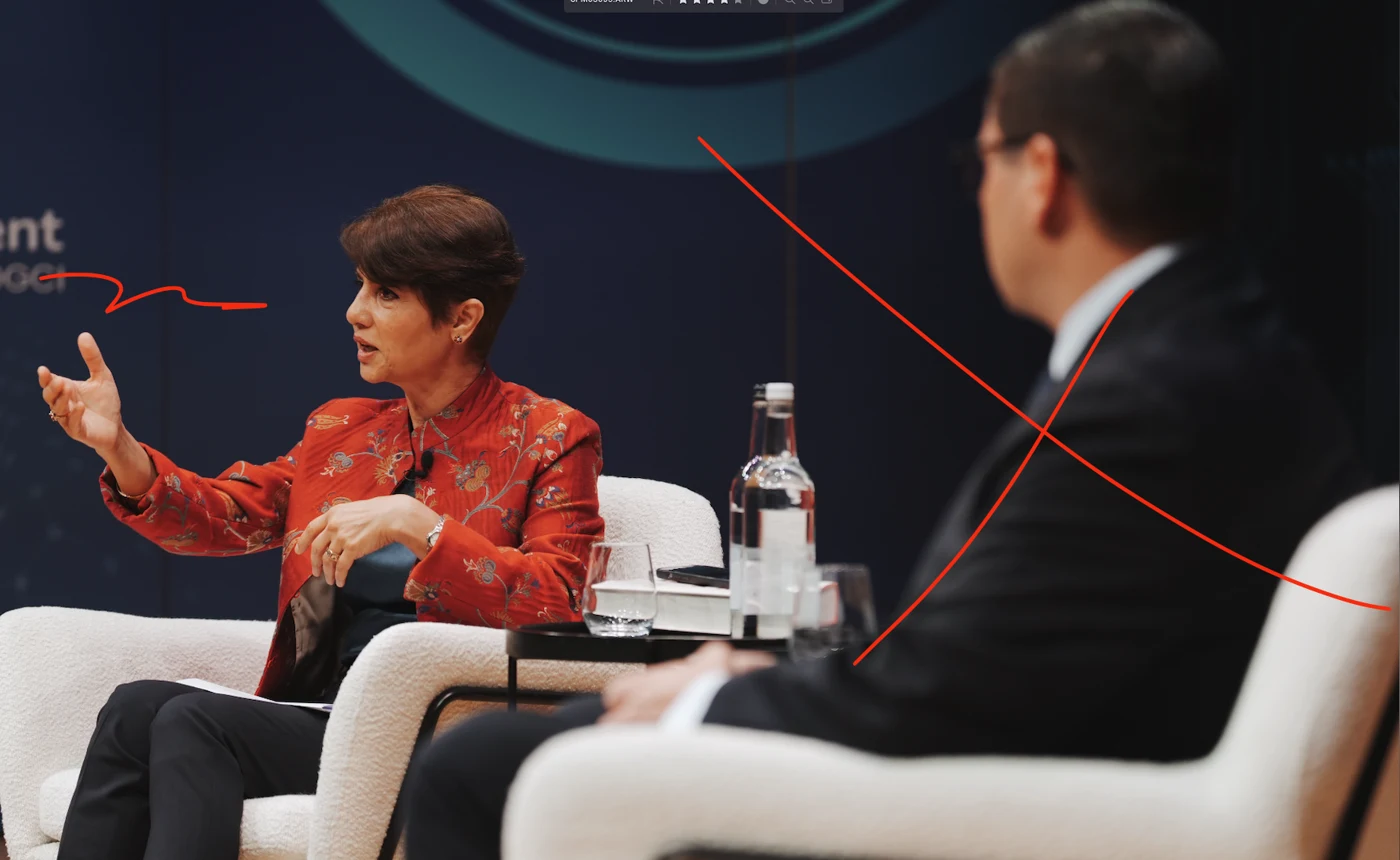
Too little looking room and a dominant foreground person compete with the active speaker.
Capture horizontal and vertical photographs. For video, agree the required delivery formats before filming.
CVM FIELD GUIDE
A full-panel shot is the start. Build a complete set of usable individual coverage.
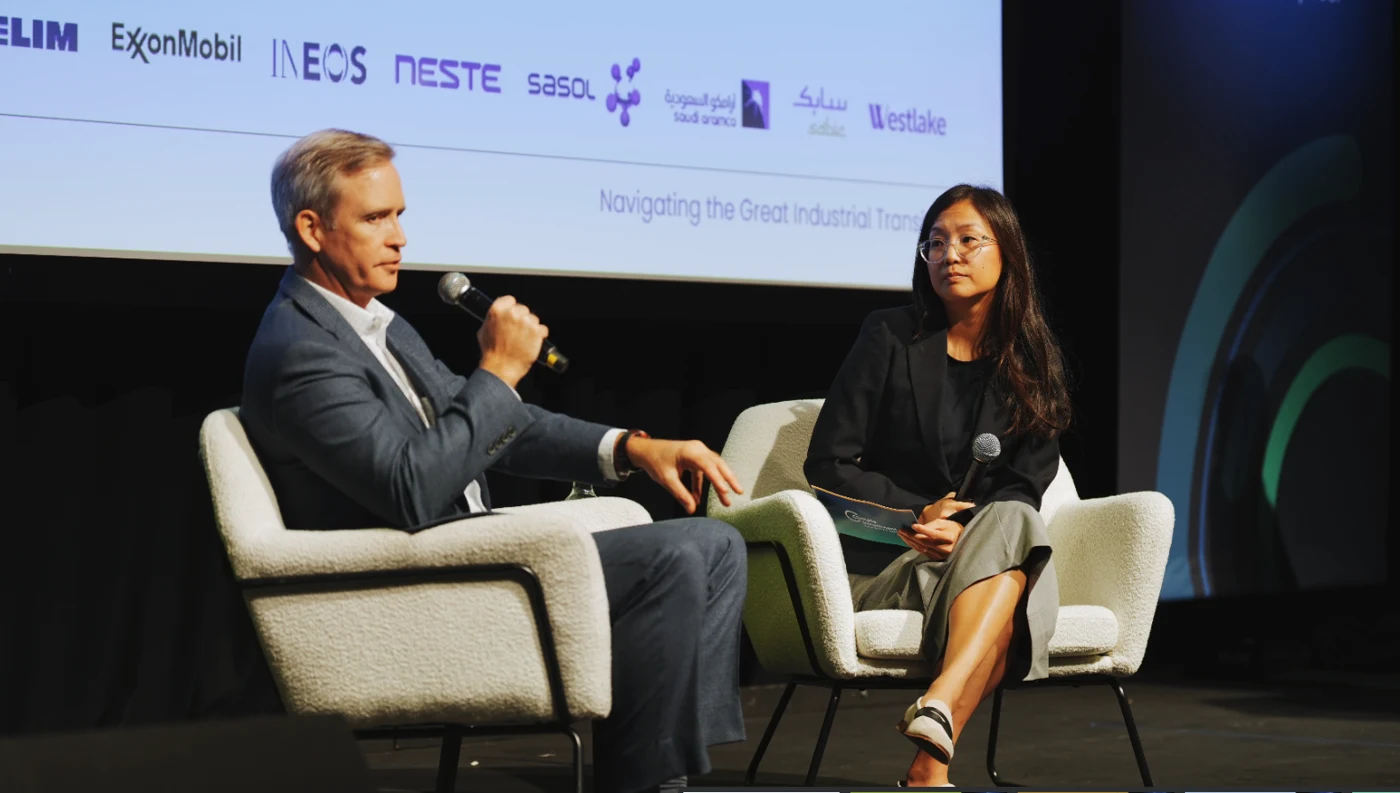
The inactive listener is in focus while the person speaking is softer. The intended subject is unclear.
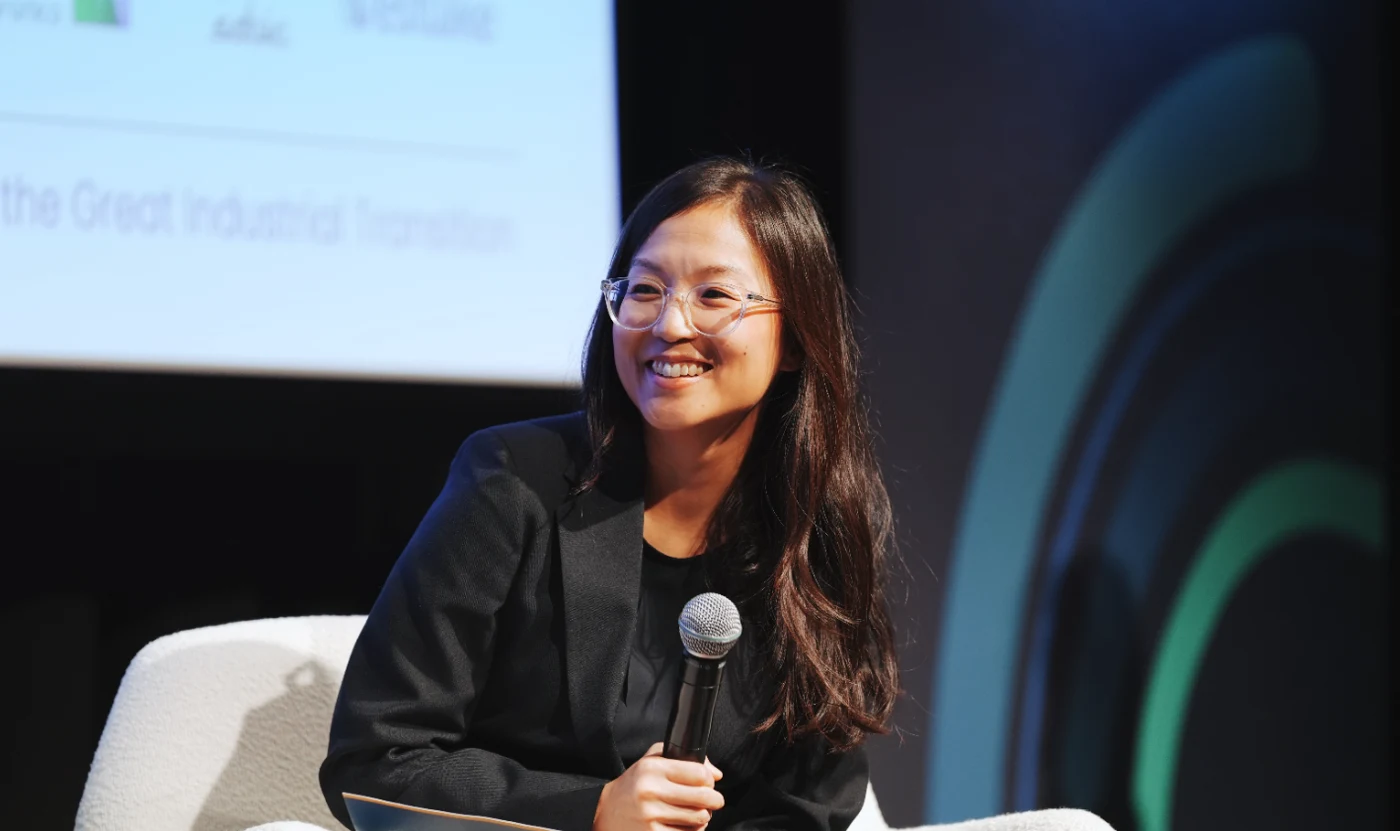
A genuine smile makes a non-speaking panellist a worthwhile featured subject.
Neutral listening expressions are acceptable in group coverage. Avoid closed eyes, awkward expressions and faces obscured by hands.
CVM FIELD GUIDE
Capture real engagement and useful context. Think beyond a room full of people.
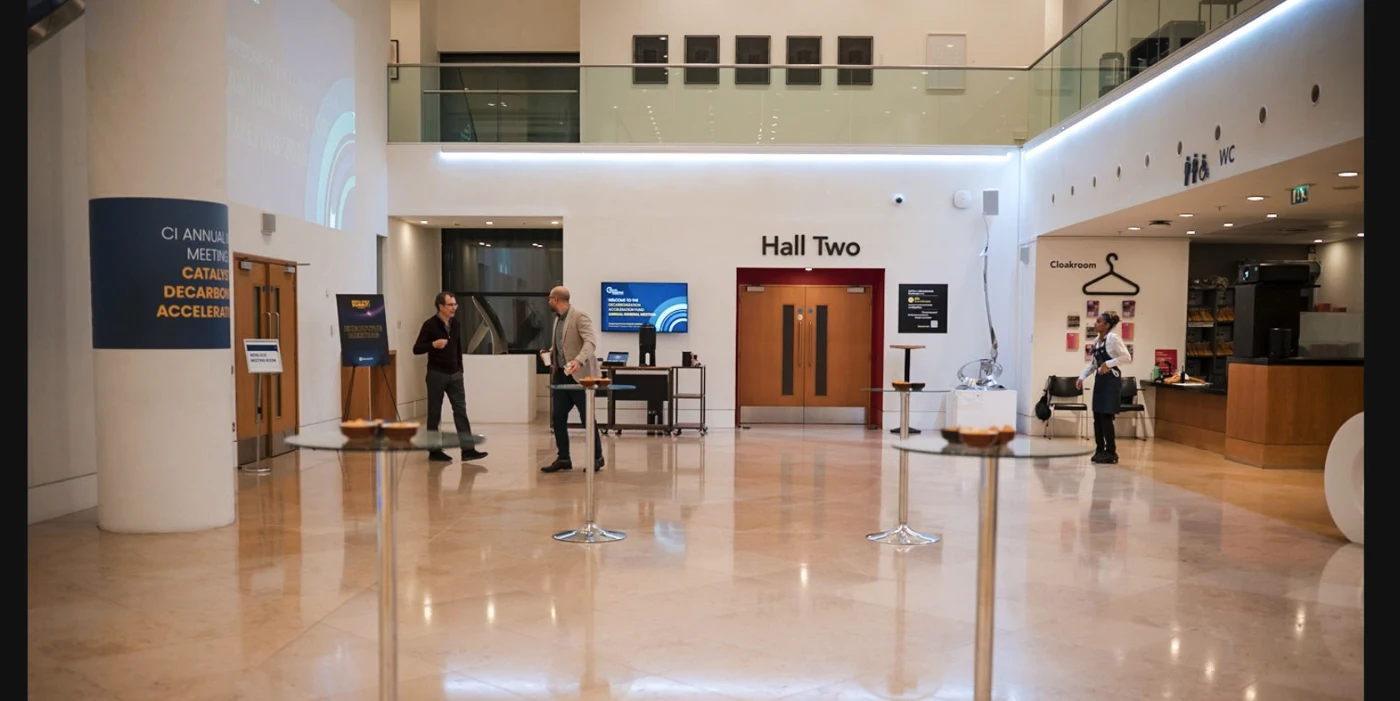
An empty foyer communicates little of the event’s energy. Prioritise populated spaces; capture empty stands for exhibitor coverage or empty rooms when requested.
Attendees interacting, a populated space and visible event branding tell a fuller story.
Look for conversation, laughter, attentive listening and interaction. Avoid faces hidden by hands or incidental candids with no clear purpose.
Secure clear subjects before creative foreground. A little depth can work; dominant backs of heads and excessive blur obscure the content.
Include branding, the venue and relevant activity. Choose angles that add visual depth against plain backgrounds without blocking the subject.
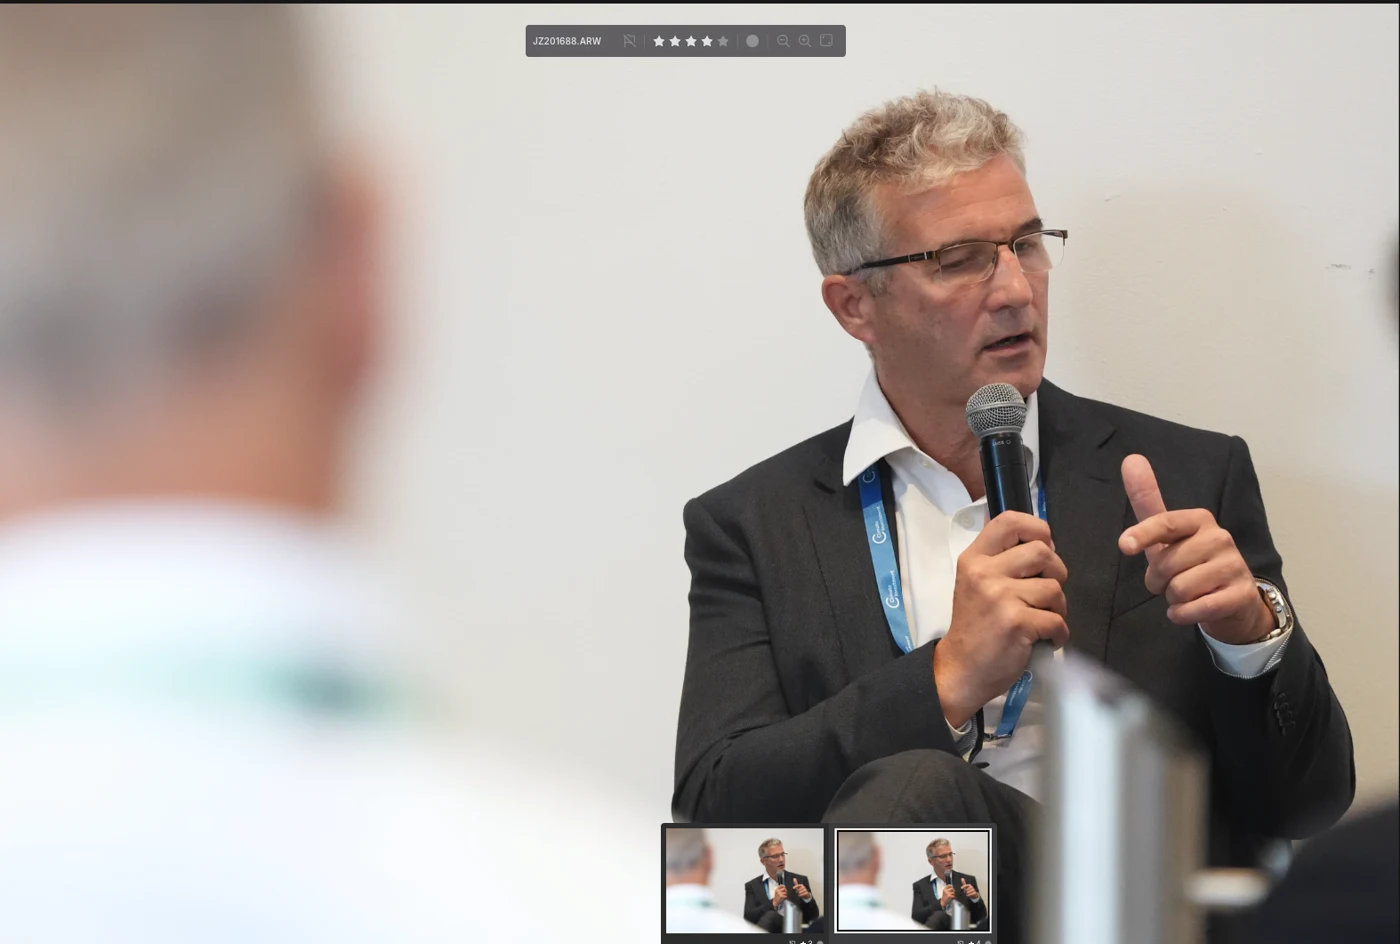
The foreground takes over. Clean speaker coverage should come first.
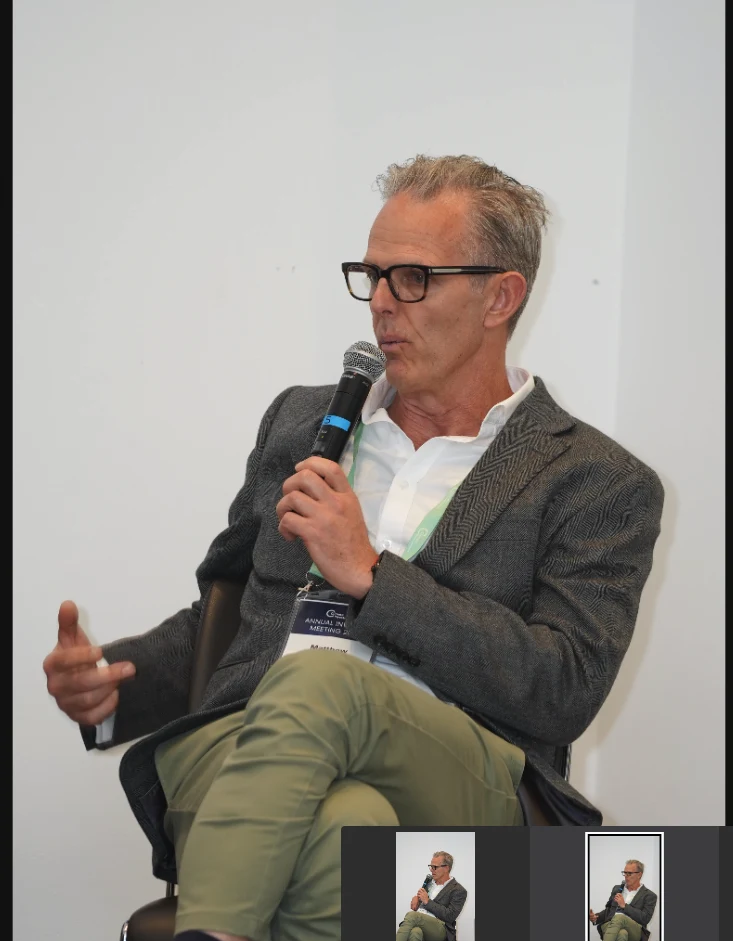
The speaker and gesture are clearer. Explore angles for more depth while retaining that clean view.
Food belongs when it supports the brief: a dinner, a Flourish event or a featured product. Routine catering is not a substitute for people, speakers and branding.
CVM FIELD GUIDE
Use your checklist to give every assigned exhibitor complete coverage.
Take a clear wide photograph showing the entire stand and its branding. Where possible, capture it both before visitors arrive and while it is active.
Photograph the team talking with visitors, demonstrating products and sharing positive reactions. Include wide, medium and tight views, plus useful details of products, displays and printed materials.
Gather the stand team, make every face visible and encourage everyone to look towards the camera and smile.
The essential shot is a wide photograph showing the complete team and the whole stand. Follow it with a closer team portrait.
Check sharpness, expressions, readable branding and complete framing. Revisit the stand if key team members are missing.
CVM FIELD GUIDE
The same clean composition and intentional coverage apply to video. Add a plan for movement, sound and continuity.
Use this additional workflow as a starting point. Confirm technical settings and recording responsibilities with the CVM lead for each job; these are proposed practices, not fixed camera-setting requirements.
Capture an establishing view, a medium view and a useful detail or reaction. Hold shots steadily long enough for an edit, with a little room before and after the action.
Know whether you are making a highlights film or recording full speeches. Agree who maintains continuous coverage and who captures cutaways; don’t stop a required recording for a creative shot.
Test the agreed microphones and feeds, monitor audio with headphones, and check exposure, focus and flicker. Match frame rate, colour profile and white balance with the team.
09 / PUT IT INTO PRACTICE
Ten event scenarios. Choose one answer, then check the explanation. No timer; review and retry whenever you need.
This is a self-check, not certification. Your score is not sent to CVM.
BEFORE YOU PACK DOWN